The PDF file format originated in the early 1990s and was used to share documents that included text formatting and built-in images. It was an Adobe proprietary format in the early days until it was released as an open standard in 2008. When you are reading a PDF document, you may want to add comments or notes to it by hand.
Contents
How to Add Comments to PDF on Windows 10
PDFgear is a comprehensive PDF software, which provides a variety of markup tools that allow you to add different annotations to PDF including comment notes. These items are usually used together with highlighting, underlining, and strikethrough tools. And it has a user-friendly interface, even if you are using this application for the first time you won’t find it hard. Download PDFgear to your Windows 10 PC now and start to experience its editing PDF features.
Step 1. Open PDF with PDFgear
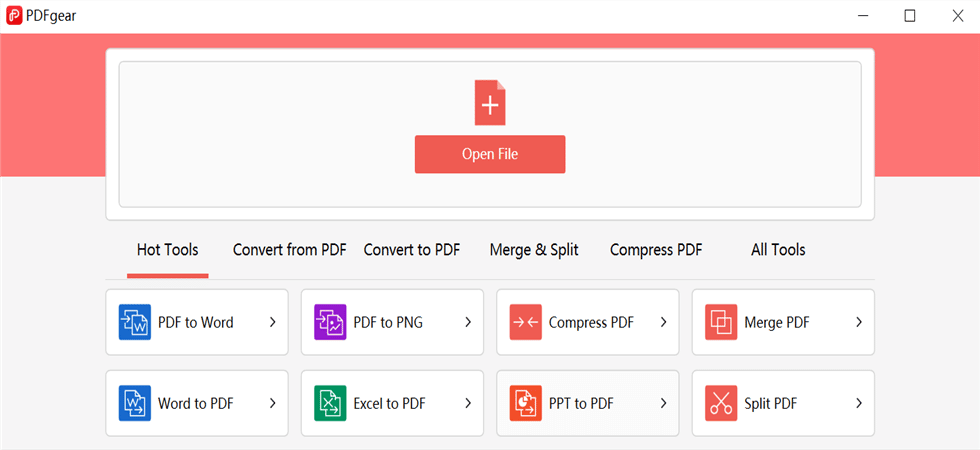
To import the PDF files you need into your PDFgear, click the “Open File” button on the main interface. Find the target PDF file from your file explorer, and then open it in PDFgear.
Step 2. Add Comment to the PDF
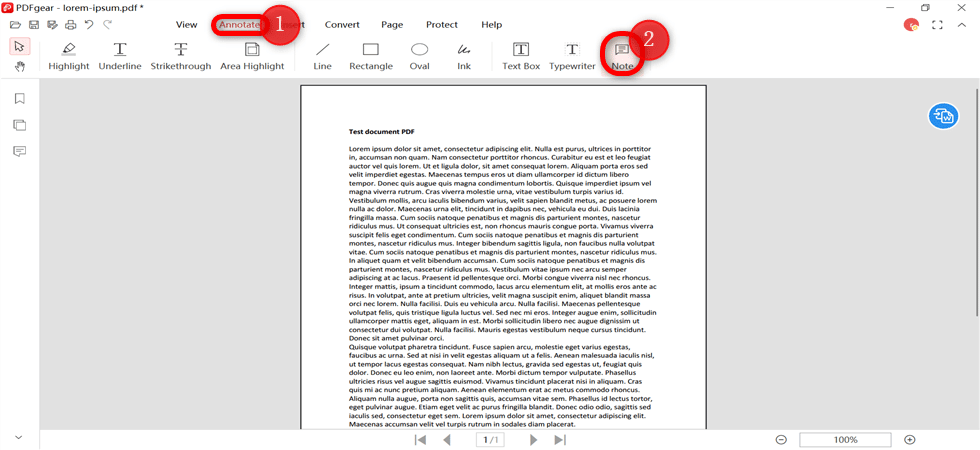
The Ribbon at the top provides a number of tabs, where we choose the Annotation option. Click the Note button in the top menu bar, and then click anywhere in the document where you want to add a comment.
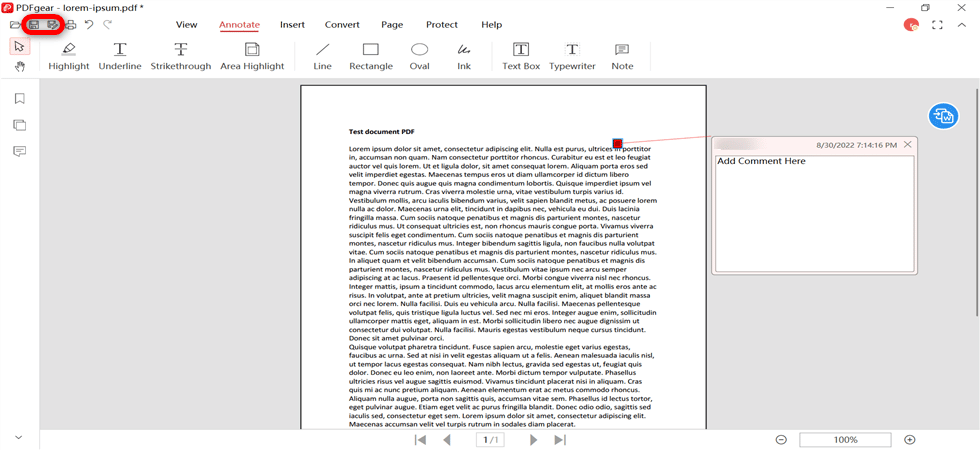
A text box will be expanded in the right sidebar of the screen, in which you can type any text you want to type.
Step 3. Save the Edited PDF
Once the editing operation is completed, you can click the Save button at the top to save the changes. Or click the “Save as” button to save the output file with a new name to a specified location for future use.
To remove the comment note from the added PDF, double-click the text and then right-click and select Delete.
How to Add Comments to PDF on Mac Preview
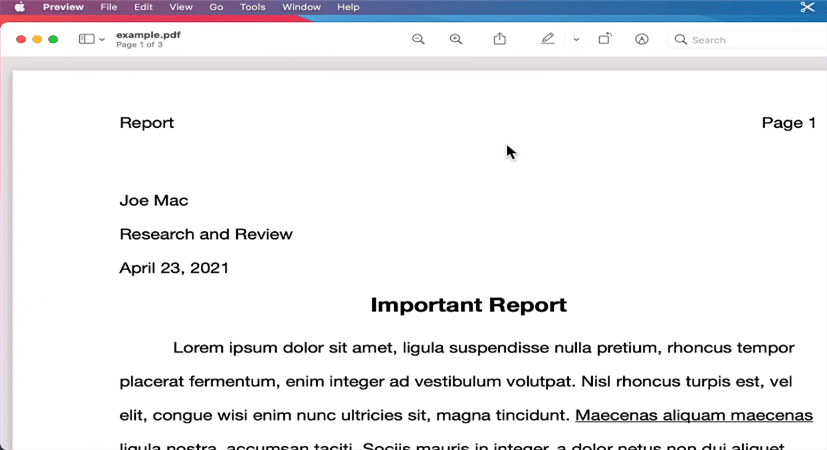
The Preview app is a standalone photo and document viewer on Macbook and comes with Markup tools. The editing tools in the “Markup” toolbar are ideal for collaboration and help you easily mark up anything you want to mark up in PDF. You can use notes and speech bubbles to comment on any text in a PDF.
Step 1. Open the Markup Tool
Open a PDF document in the Preview App on your Mac and click the Markup toolbar option at the top. If the Markup toolbar isn’t showing, click the Show Markup Toolbar button.
Step 2. Add A Note to the PDF
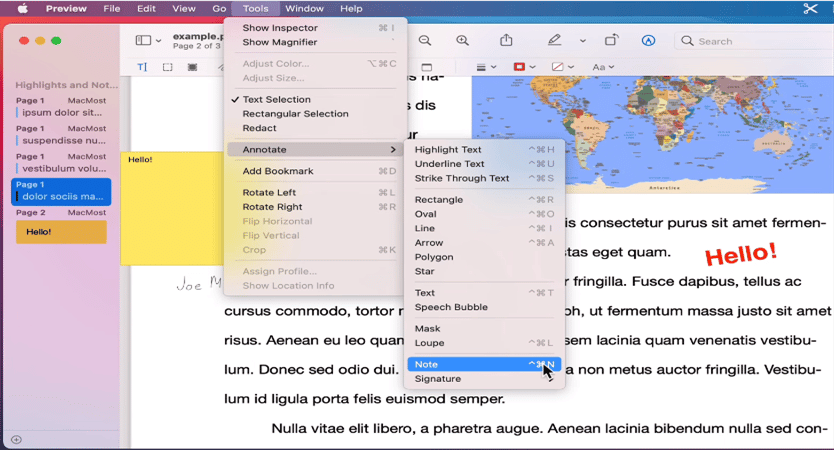
Click the Note button , then type the text that you want to comment on. To change the note color, Control-click the note, then choose a color. You can drag the note to a different location.
Step 3. Add A Speech Bubble
Choose Tools > Annotate > Speech Bubble, then type new text. You can use typing comments about this document, if available. To resize the speech bubble, drag a blue handle.
When you are satisfied with the changes you have made, you can save the PDF file in the File menu at the top.
How to Add Comments to PDF via PDFgear Online Free
As an all-in-one platform, PDFgear allows almost all netizens to access its PDF editor for free. You can add comments to your PDF documents anywhere at any time as long as you have a stable internet connection. What is worth mentioning is that PDFgear can provide much more than just the ability to add comments to PDF, you can experience a variety of editing features.
Step 1. Access to Online Editor
PDFgear is compatible with almost all browsers and systems and even works well on iOS and Android.
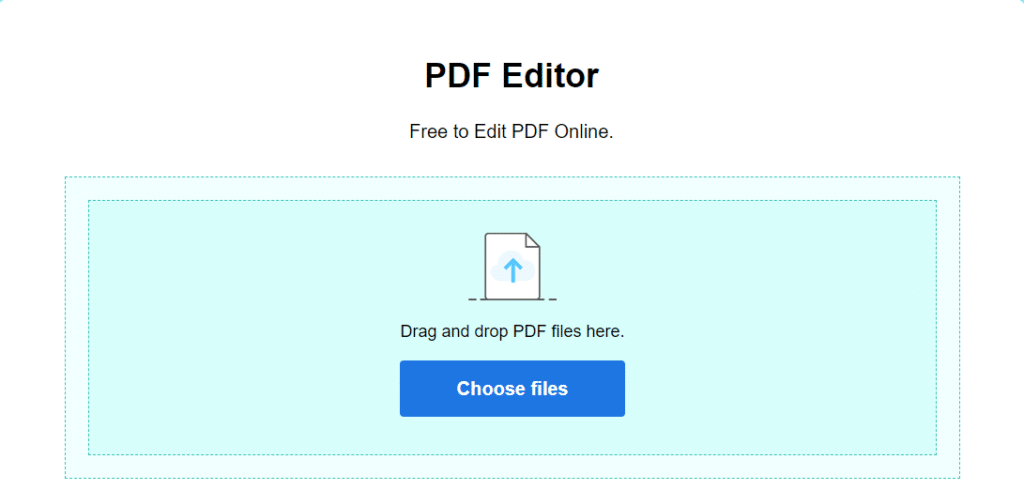
To import a PDF document to which you want to add comments, click the “Select File” button or drag and drop the PDF file directly into the toolbox.
Step 2. Add Comments to PDF Online
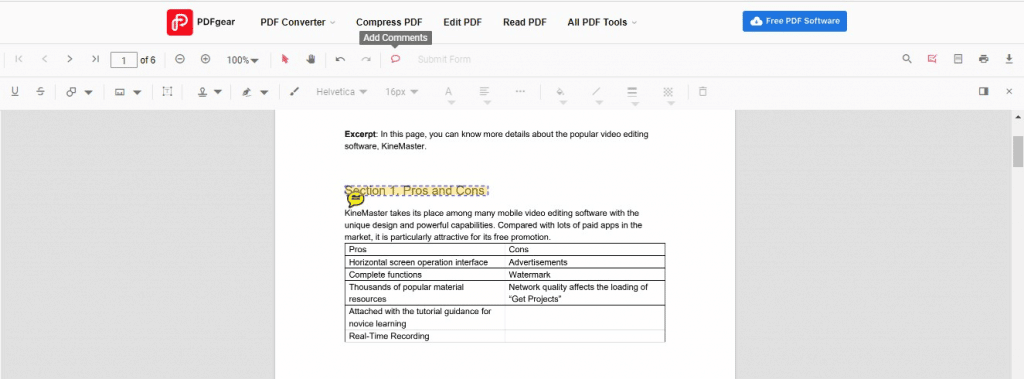
After importing a PDF file, you can locate the “Add Comments” icon at the top menu bar and click it. To add a comment, click anywhere in the document.
Once the Comments dialog box appears in your document, you can double-click it to enter text in the right panel. Once you have entered the text, click the Post button to complete the addition.
Step 3. Download the PDF File
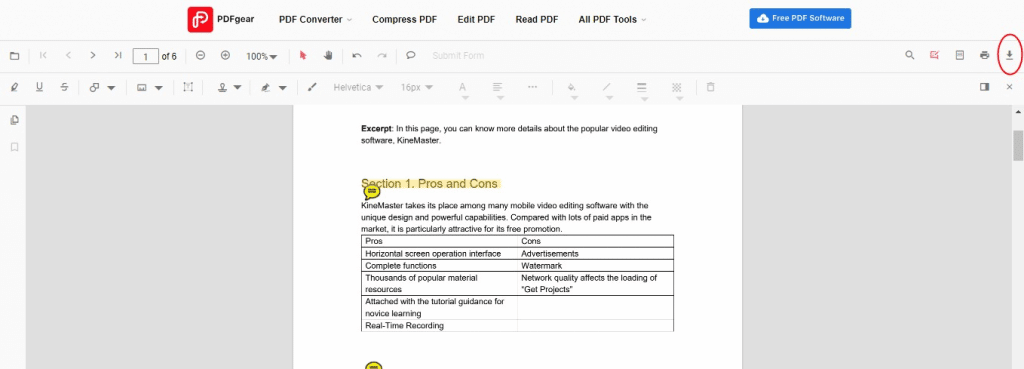
After you have finished adding comments and other information to the PDF, click the Download button in the upper right corner to save it to your device.
How to Add Comments to a PDF in Google Drive
Google Drive is more than just a simple cloud service, some small businesses also use it as collaboration software. You can also open a PDF document in Google Cloud Drive, then add a comment to it and export the new PDF document. The following content focuses on how to add comments to a PDF in Google Drive.
Step 1. Open PDF in Google Drive
Before you can start adding comments to PDF within Google Drive, you need to sign in to the website with your Google account.
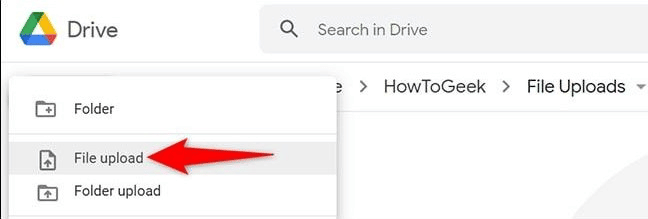
To add a PDF document, select “New” > “File Upload” on the left. You can press “Ctrl” to select multiple PDF files to import, and you will receive a notification in the bottom right corner after a successful upload.
Step 2. Add Comment to the Text in PDF
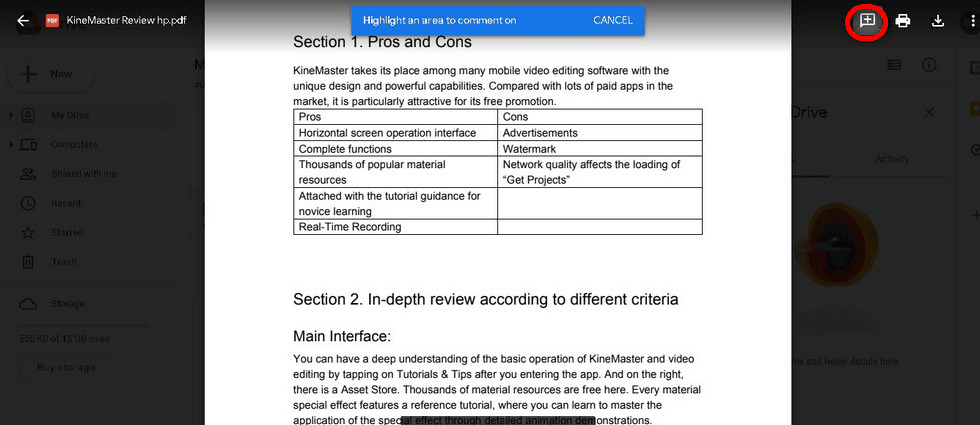
The “+” sign in the upper right corner is a button to add comments, which is located in the upper right corner of the screen. Click it to add a comment anywhere in the PDF document.
Step 3. Click to Download the Edited PDF
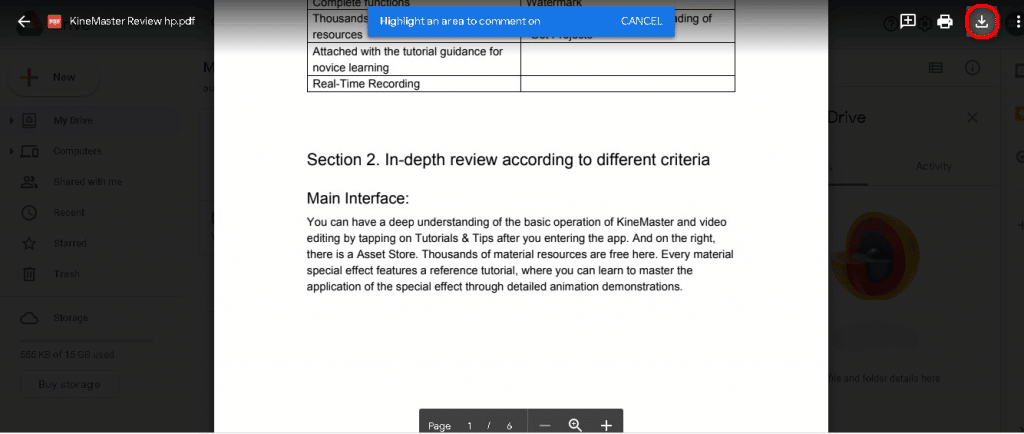
Once finished, click the Download button to get the PDF document with comments. You can find the downloaded PDF file in the Downloads folder of Google Chrome or in File Explorer.
The Final Words
To enable you to easily complete the task of adding comments to PDF, we have discussed four methods above. If you prefer to use online tools, then you can try Google Drive and PDFgear online versions to complete the task of adding comments to PDF. Besides adding comments to PDF documents, maybe you also need to rotate or delete PDF pages. Fortunately, you don’t need to search for these tools separately in different applications, PDFgear desktop packs more than 20 related tools in your pocket.

