Picture this: comparing files on a browser or desktop GUI is a piece of cake. You’re treated to a delightful display of side-by-side windows adorned with vibrant colors. But what about the command line? What if you find yourself in the depths of a server devoid of a GUI, like Linux.
Fear not, for our Linux tool collection comes to the rescue once again. Within this treasure trove, a multitude of tools awaits, ready to tackle this very challenge. Today, we’ll explore a selection of my personal favorites that will leave you in awe.
Gone are the days of fretting over file comparisons in a GUI-less environment. With these Linux tools at your fingertips, you’ll discover a world of possibilities.
Contents
Five Easy Techniques To Compare Files In Linux
Trust us; below are the easiest techniques to compare Linux files you’ll ever see.
1. cmp
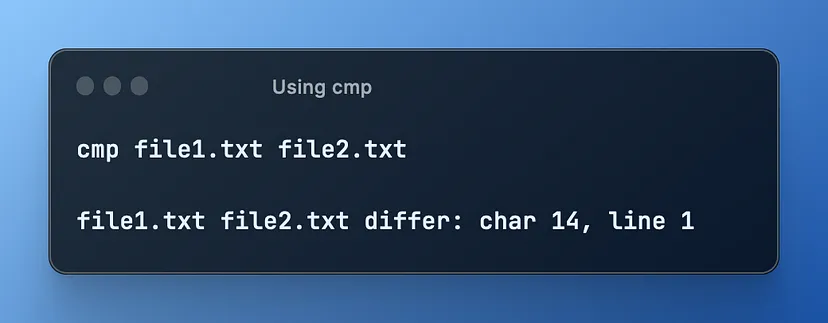
If you require a byte-level comparison between Linux files, one of the simplest methods is to use the “cmp” utility. This utility functions exactly as its name suggests—it compares two files. By using cmp, you can easily identify even minor changes, such as a character or a space, and it will promptly highlight the first difference.
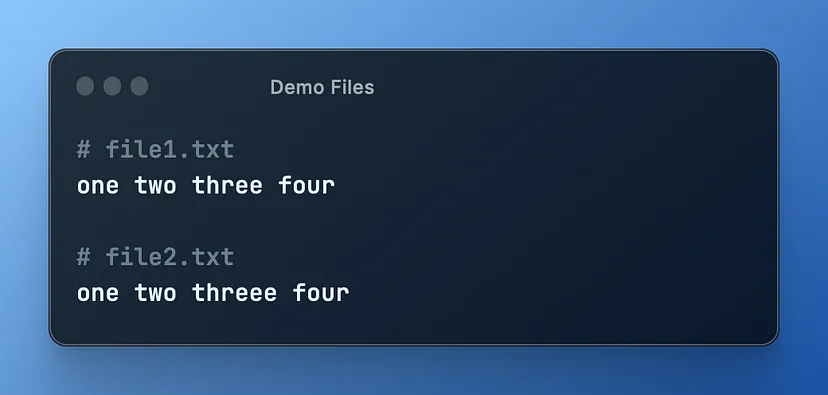
To demonstrate, let’s consider a pair of example files. Now, we can use cmp to compare these files and display the differing content.
The comparison output reveals the presence of an extra “e” in file2.txt, which was added accidentally. cmp successfully pinpoints the exact location where the difference begins and returns the result promptly. It’s important to note that cmp identifies the first difference it encounters and does not provide a comprehensive list of all differences.
This utility proves to be highly valuable for error detection or monitoring changes in a collection of files. You can easily integrate it into a shell script to track file modifications or run it as a batch process to identify errors.
If you’re looking to compare text files on a line-by-line basis in Linux, the diff utility is an excellent choice. It offers a wide range of configuration options and provides results in various formats. Unlike cmp, diff is more flexible by default and generates a comprehensive report of the differences between files.
2. diff
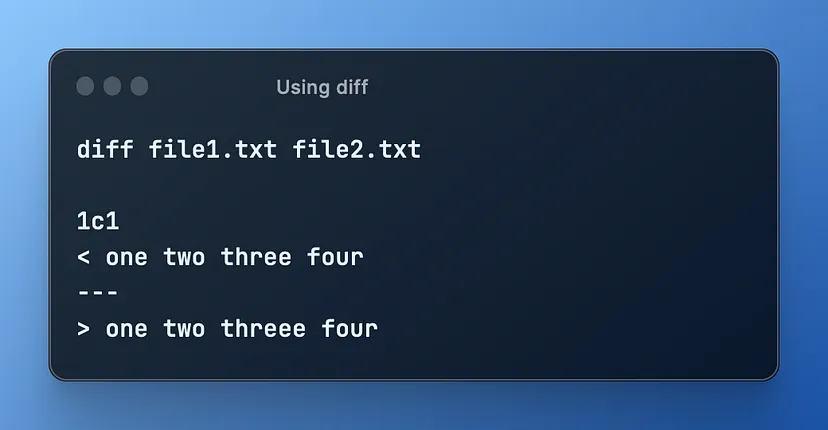
Let’s perform a basic diff using our previous example files:
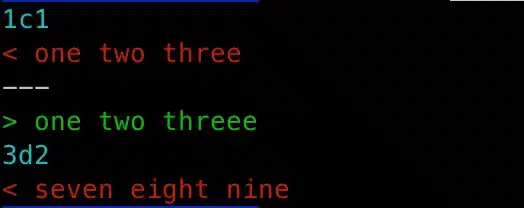
The output is similar to before but with some additional benefits. This utility is specifically designed for line-by-line comparisons, so it emphasizes that aspect. The first line of the output indicates a single change occurring on line 1.
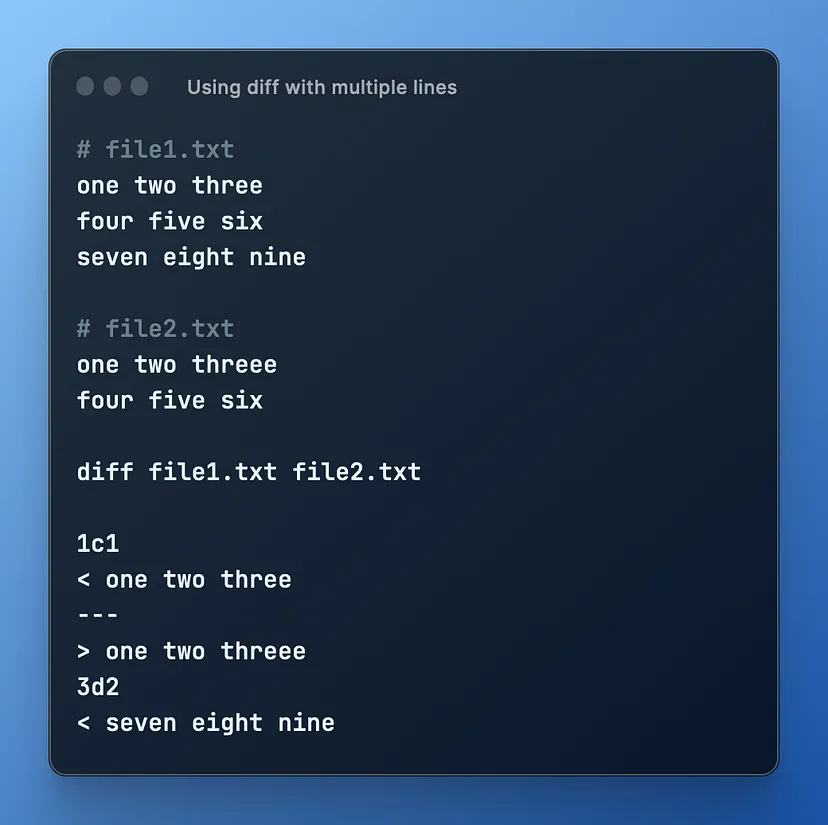
While this is helpful, let’s explore files with multiple lines to truly appreciate the power of diff:
Now we can clearly see the exact locations where changes, deletions, or additions have occurred. In addition to the change we observed earlier on the first line, the deletion on line three is also listed.
Another interesting feature of the diff utility is its ability to output in RCS format. This means that if you want to generate a patch using an updated version of a file for source control purposes, you can easily achieve that by providing a simple argument.
3. colordiff
If you’re a fan of the diff command and its remarkable flexibility but desire more visually appealing output, then you’re in for a treat. Enter the colordiff utility—a straightforward wrapper for diff that retains the same parameters but adds the delightful advantage of colorized output.
With colordiff, you can utilize it just like diff, but you’ll spot changes more quickly as the output illuminates like a festive Christmas tree. It’s a simple yet highly effective enhancement that enhances your diff experience.
4. wdiff
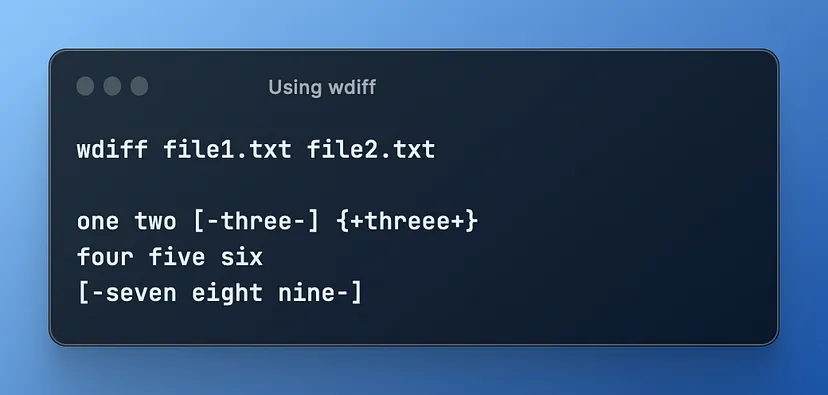
If you’re seeking an even more granular level of comparison in Linux beyond line-by-line or character-by-character, wdiff comes to the rescue. This nifty utility allows you to perform a word-by-word diff, providing detailed output on how to complete words that differ between your files.
Let’s explore how easy it is to use:
Now we can observe a merged view of both files, with differences denoted using simple notation. For instance, the additional “e” on line 1 is represented as a word removal followed by an addition symbol. The absence of the last line is indicated by [- symbols, indicating the removal of all words.
If you’re working with natural language text and want to focus specifically on individual word changes, wdiff proves to be an excellent tool. While there are several configuration arguments available, most of them primarily serve to control minor changes in output formatting.


